Hi everyone!
To celebrate that I nearly have had 30.000
visitors here at my Magnoliablogg sence june 2009,
visitors here at my Magnoliablogg sence june 2009,
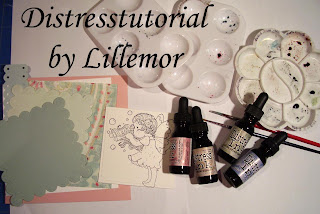
I want to share my very first Distresstutorial with you.
This is a just how I do. There is so many different ways
with small or big differences in how people colour
there images.
This is a just how I do. There is so many different ways
with small or big differences in how people colour
there images.
But as I love to read tutorials-
and never get boored, I want to share mine with you.
and never get boored, I want to share mine with you.

My creatingprocess always changes,
depending on wich mood I am in and on
what kind of card I am making.
If I have a new image to colour I might just colour
it in the colours I´d like at the time.
what kind of card I am making.
If I have a new image to colour I might just colour
it in the colours I´d like at the time.
Then I choose papers that matches the image.
This is the most exciting way to create I think-
This is the most exciting way to create I think-
it´s always a little surprice how the card turns out.
I usally have an ideá about the card, something
I want to try or something I´ve seen somewhere else but
I never really know how the card will turn out in the end.
I usally have an ideá about the card, something
I want to try or something I´ve seen somewhere else but
I never really know how the card will turn out in the end.
If there is a Dt-job I might have to take a look
at the material that belongs to the image first.
I study colours on paper and embellishments
at the material that belongs to the image first.
I study colours on paper and embellishments
to get an oppinion about which distresscolours might work.
This is usually how I work and it goes a little faster.

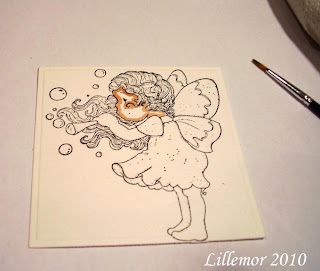
I have inked Bubbling Tilda with Making Memories Black.
The paper is an aquarellpaper 300 gr with smooth surface.
I by it at Claes Ohlsson in Sweden.
I have two syntethicbrushes I use, 2 and 4.
I use the bigger one to pick up distress from the
"ink refill-storage" you can se here below.
Even the bigger brush is small at the tip when it´s
wet and I also use it for colouring.

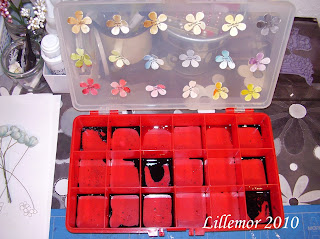
I keep a couple of inkdrops in every box in
this storage. Then I take a drop of ink with my big brush
on my colouringpalette.
Now I have a little problem as I´ve got
some new colours and there is no room for them here...
So I just might have too make some changes about it later on.
Here I have mixed tattered rose + vintage photo+water
for skincolour and added it around the face.
I always start around the edges. I put clean the brush
in water to take away the colour. Then i gently toch the
this storage. Then I take a drop of ink with my big brush
on my colouringpalette.
Now I have a little problem as I´ve got
some new colours and there is no room for them here...
So I just might have too make some changes about it later on.

Here I have mixed tattered rose + vintage photo+water
for skincolour and added it around the face.
I always start around the edges. I put clean the brush
in water to take away the colour. Then i gently toch the
brush on some soft tissuepaper to get it almost dry.
With circlemoves I put the colourline in to the middle,
trying to leave i bright spot in the middle.
With circlemoves I put the colourline in to the middle,
trying to leave i bright spot in the middle.
I might have to clean the brush from colour
several time to not get to much colour at the area.
I let the colour dry a little and then
I do the same thing again.
I put on colour 2-3 times for skin always
starting in the edges to get nice shaddows.
several time to not get to much colour at the area.
I let the colour dry a little and then
I do the same thing again.
I put on colour 2-3 times for skin always
starting in the edges to get nice shaddows.

Here the face got unusally bright,
and I have put the colour to much into the middle.
It´s not easy to take pictures at the same time...;o)
The face certainly needs more colour!
While it´s drying a little I start colouring Tildas
arm, that not is next to the face. This is very important
to think about, otherwise the colour will get mixed up´
with each other and it will ruin the image.
arm, that not is next to the face. This is very important
to think about, otherwise the colour will get mixed up´
with each other and it will ruin the image.
I always colour different parts of the image that is
not next to each other to avoid the colour to get damaged
and mixed up.
not next to each other to avoid the colour to get damaged
and mixed up.

With my bigger brush I make circlemoves softening
the colour.
the colour.

Here I have added skincolour on Tildas arm for
the second time. Then I clean the brush in water
and touch the brush gently on some tissue paper.
Then I softs the colour with circlemoves
from the edge of the area, leaving a brigh spot.
I tries to think how the light is falling
and keep the shadows at all areas in the
same position...This is truly something
I thinks is very hard but it´s just to
practice and practice over and over again....

Here I have put some Broken China on Tildas
beatiful wings. You can see that I start with really
light colour in the beginning, to avoid getting to
much at the area.
beatiful wings. You can see that I start with really
light colour in the beginning, to avoid getting to
much at the area.

Here I have added victorain velvet on Tildas
dress and the top of her wings.
dress and the top of her wings.
Colouring a image can takes some time for me...
It´s not anything I can hurry up with.
It´s not anything I can hurry up with.
I keep turning back to areas several time,
3-5 times to get sharper shadows.
Sometimes i also mixes disress ink colours with
each other. To get new colours ot to get a darker
colour that I can use for shadow.
If I want to get "shadowcolour" I usually mixes
it with walnut stain, weathered wood or black sooth.
each other. To get new colours ot to get a darker
colour that I can use for shadow.
If I want to get "shadowcolour" I usually mixes
it with walnut stain, weathered wood or black sooth.
It´s important just to put a little of this shadowcolour
around the edges and not circle it into the middle so much,
otherwise the whole area will get this colour.
around the edges and not circle it into the middle so much,
otherwise the whole area will get this colour.

Now you can see the shadows taking place.
For the hair I have antique linnen, walnut stain and
vintage photo. I tries to keep some areas bright.

When the image is ready and dried it remains
to get a nice contourline around Tilda.
to get a nice contourline around Tilda.
I have used faded jeans here.
You can use any colour but I prefer this one.
First I put the colourline around Tilda
and then I take rather a lot of
water into the big brush. I softens the
colourline all round her and it will make her
"pop out" from the paper.
You can use any colour but I prefer this one.
First I put the colourline around Tilda
and then I take rather a lot of
water into the big brush. I softens the
colourline all round her and it will make her
"pop out" from the paper.
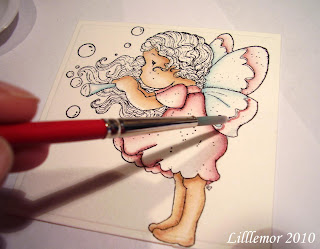
It is important to just work in the colourline
and not tuch the colour on Tilda with the brush. As I have
and not tuch the colour on Tilda with the brush. As I have
rather a lot of water in the brush, it might mix
up the colours otherwise...

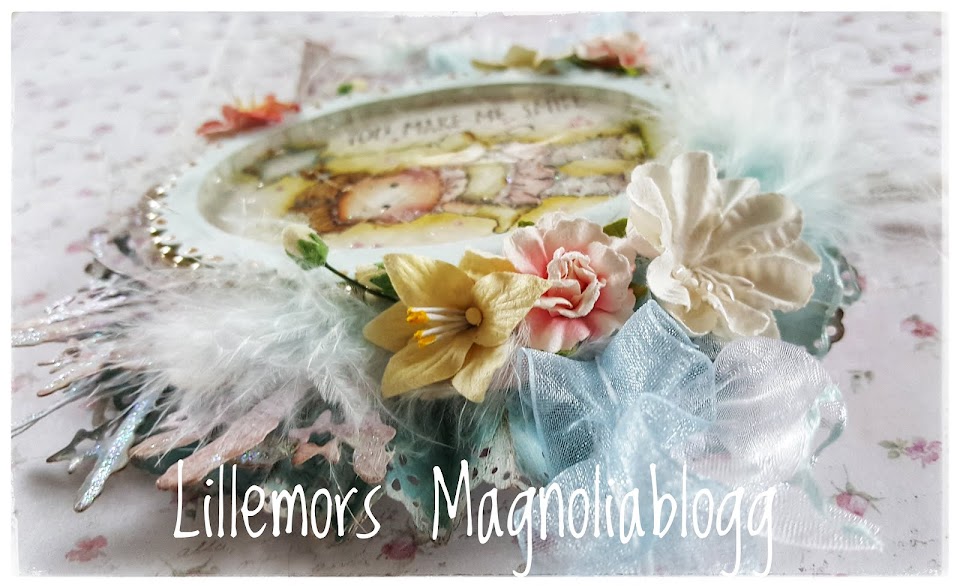
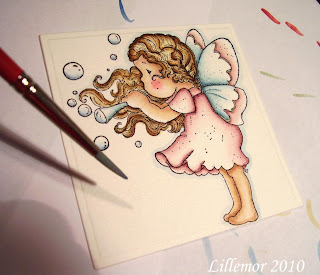
Here is the finished card!
I have cut out Tildas wings for that nice
popup look.
Thanks for visiting me today!

Thanks for the tutorial, it's a great one ^^
SvaraRaderaAlways like to see how the others are doing and like your coloring so much!
Hugs
Hélène
thank you so much for the tutorial, i have got a few of the distress inks, but i have never been too sure which colours to use where, you have really helped! sarah x
SvaraRaderaThanks for this great tutorial, now I can give a try with my Distress Inks.
SvaraRaderaThanks for your tutorial.
SvaraRaderaYour card is gorgeous.
Hugs Esther
Great tutorial Lillemor!
SvaraRaderaThanks for sharing it with us :)
And your card is so beautiful. I love the image, it´s so adorable. And you have done awesome job with the decorations.
Fantastic! :)
Have a lovely Sunday :)
Hugs,
Karita
Kjempeflott tutorial Lillemor, og for et kort!! Tilda er helt nyydelig, og det er så gøy å lese hvordan du fargelegger henne!:))
SvaraRaderaKlemmer fra Camilla.
Thanks for your TUTERIAL. Thanks so much.
SvaraRaderaHugs Renate
Nydelig kort og flott tutorial!
SvaraRaderaHa en fin kveld!
-klem-
Hello Lillemor,
SvaraRaderaGreat tutorial! Your card is fabulous, as always. I love to visit your blog because everytime I do, there will be something beautiful to look at!
Have a great week!
Hugs from Holland,
Monique xxx
Awesome tutorial...I wondered how you ladies were storing your re-inkers. I've added the new colors, and I have to figure out a new way also. LOVE YOUR TALENT.
SvaraRaderaSheila
Your cards are gorgeous. Thank you so much for the lovely tutorial =)
SvaraRaderaHugs,
Shell
Thank you so much for this wonderful tutorial! Just love visiting all your pretty creations.
SvaraRaderaBlessings,
Gloria
Underbart färglagt och kortet är fantastiskt sött med alla små detaljer =D
SvaraRaderaMagnetalfabetet som jag använder heter evolution. Det är nog ett av dom bästa köp jag har gjort! Passar till det mesta =D
Ha en härlig dag!
Kram
Malin
Thank you! Thank you! I am just starting on Distress inks and this is soooo helpful! Your card is amazing!
SvaraRaderaThank you Lillemor - I finally gathered the courage to start w/the distress inks a few weeks ago....Loving the new colors too! The face is challenging...can't quite figure out how to get the color on the cheeks right! I'll keep trying and use my copics in between...lol Thanks again! Your painting and card are gorgeous!
SvaraRaderaPam Going Postal
thankxx for this lesson I try many times but always not right I hope I see it in this tutorial how it realy works I give it a try again !
SvaraRaderayour card is amazing !!
greethings Cora xx
what a great tutorial thank you for sharing with us the finished card is beautiful Dorothy xxx
SvaraRaderaThank you for this wonderful tutorial! Your coloring is amazing and I love what you created here with this beautiful image. hugs, Angela
SvaraRaderathanks for the tutorial. I love the distress coloring look. Your coloring is just wonderful.
SvaraRaderaI love the finished card.
Peggy
è il più bel tutorial fatto sulla colorazioone dei timbri magnolia soprattutto perchè amo il tuo stile e il tuo modo di miiscelare i colori e sfumarli ti faccio i miei complimenti
SvaraRadera